 This is a great tip on how to customize both the bullet symbol and color in a Word document posted by Susan Harkins for TechRepublic. We thought we would share it with you.
The Font Color option changes list items in a bulleted or numbered list. Susan Harkins shows you how to change the color of the actual bullet or number in a list.
Creating a bulleted list in a Word document is an easy task. You select the list and click Bullets in the Paragraph group. Customizing a bulleted list is also easy. You can choose from several built-in bullet characters or insert a symbol or even a picture as a bullet. All of these options are fairly easy to apply, even for beginners. One change that isn’t as obvious is how to change the color for the actual bullet characters.
There are several methods for generating a bulleted list. To get a little more bang for your buck out of this article, I’ll show you how to insert a symbol to customize a bulleted list. Then, I’ll show you how to change the bullet symbol’s color.
Use a symbol as a bullet
You can work with any list, but for this example, let’s keep it short and simple. After entering the list, select the lines that comprise the list. Then, click the Bullets drop-down in the Paragraph group (on the Home tab). If you click this option instead of clicking the drop-down, Word will use the default bullet character. We want to insert a symbol, so be sure to click the drop-down. Then, do the following:
1.You could choose any of the bullet characters in the library, but for this example, select Define New Bullet (Figure A).

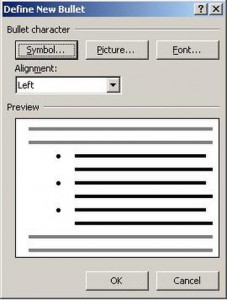
2.In the resulting dialog, click the Symbol option (Figure B).
3.From the Font drop-down, choose Symbol (you can choose other font options to find more symbols).
4.Select one of the many available symbols (Figure C).
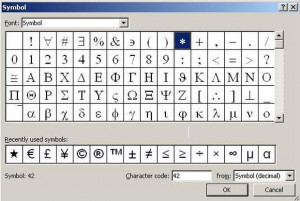
5.Click OK to preview the symbol in the Define New Bullet dialog.
6.Click OK a second time to return to the document. You’ve probably used a symbol to customize a bulleted list. If not, you just learned something new!
Change the color
With the symbol inserted as a bullet character, we’re ready to change its color. If you use the Font Color option in the Font group, Word will change the color of the text, not the bullets. To change the color for the bullets, do the following:
1.Select the list, and click the Bullets drop-down in the Paragraph group.
2.Choose Define New Bullet.
3.This time, click the Font option instead of the Symbol option as you did before.
4.The default in the Color drop-down will probably be No Color. This is the option you’re looking for. Click the drop-down and choose a color — any color from the pallet (Figure D).
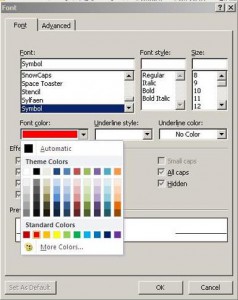
5.In Figure E, you can see that I chose red in the preview section. If the Font option is dimmed, you can’t change the symbol’s color. You’ll discover that most picture objects and clip art bullets can’t be customized.
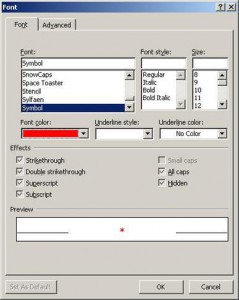
6.Click OK twice, and you’ll see the results
Worth noting
There are other Font options that you can use to further customize a bullet character. In this example, there’s not much more you can do besides apply the bold attribute. Some symbols will be a bit more flexible, so when changing the color, be sure to examine the other options to see what other properties are available.
Not all pictures work well as bullets. Stick with simple graphics with a white or transparent background for the best results.
You can use this same technique to change the color of numbers in a numbered list (using the Define New Number Format option from the Numbering drop-down). You’ll also use this technique to change the color of the built-in bullet characters in the bullet library.
For more information on solutions for running your businesses’ technology more efficiently, visit our website or contact Megan Meisner at mmeisner@launchpadonline.com or 813 448-7100 x210.


