 Outlook contacts are a powerful tool, but the more contacts you have, the more unwieldy a task can become. The key to working more efficiently with multiple contacts is to define and use a group. In this article, I’ll show you how to make the same modification to several contacts at the same time, using a group.
I’m using Outlook 2016 desktop on a Windows 10 64-bit system, but this technique will work in earlier versions. This technique isn’t possible in 365’s Mail.
What’s a group?
A group comprises multiple records that share an attribute. For the purposes of this article, a group is a collection of contacts who share a common value. For instance, a group might be all the contacts who work in a particular department, who work on a particular project, or who work for the same company. They share something that’s meaningful to you.
Updating contacts
To update the same value, or field, for multiple contacts, you’ll need to switch to list view, group the list, and then update one of the records in the appropriate group. To illustrate, let’s update the Company field for TechRepublic contacts. Currently, the Company is TR; let’s change all of them to TechRepublic. We’ll begin by creating a list view of contacts as follows:
Open the People window (Contacts in earlier versions).
Click the View tab.
In the Current View group, click Change View, and then choose List from the dropdown options (Figure A).
Figure A
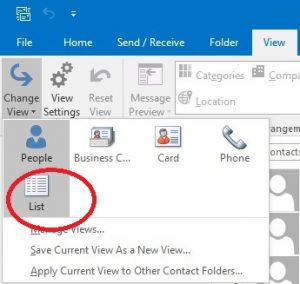
Change the current view to a list.
The next step is to group the list by the field that relates your data, which doesn’t have to be the field you’re updating but most likely is. Figure B shows the grouped list after clicking the Company header cell.
Figure B
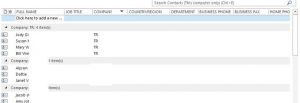
Sorting your list creates groups.
Working with all those contacts visible is difficult, so collapse them by choosing Collapse All Groups from the Expand/Collapse dropdown in the Arrangement group. You can also double-click a group’s header to toggle an individual group. Next, expand the TR (TechRepublic) group by double-clicking that header. You’ve just hidden all contacts except those in the group you’re updating.
Collapse all the groups.
Figure C
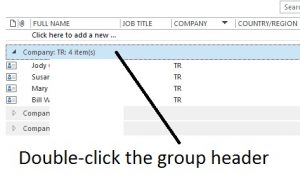
Expand the group you’re changing.
After expanding the group, open any contact in that group and update the Company field from TR to TechRepublic as shown in Figure D. Click Save & Close when you’re done. You’ll see a new group for TechRepublic with one contact, as shown in Figure E.
Figure D

Make the change.
Figure E
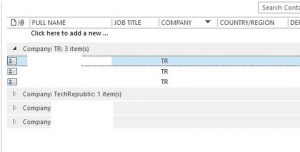
There’s a new group named TechRepublic.
All that’s necessary to update the remaining contacts in the TR group is a little dragging. First, collapse the TR group (or not, but a collapsed group is easier to work with). Next, drag and drop the TR group header to the TechRepublic group header. It’s difficult to see in Figure F, but Outlook will display a representation of the contacts as you drag them and update the tooltip as you go. If you don’t collapse the group (I didn’t) it’s easy to drag individual records to the wrong group. On the other hand, it’s a simple way to move a subset of contacts from one group to another. You can collapse or not—it’s up to you.
Figure F
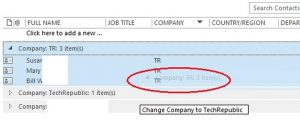
Drag the TR group to the TechRepublic group.
The number of contacts for the TechRepublic group updates from one to four. Open any of the contacts in the TechRepublic group and you’ll see that the Company value is now TechRepublic. Outlook did the work for you!
Outlook updated all the contacts in the TR group when you moved them to the new TechRepublic group.
Updating a contact is easy, but updating the same value for multiple contacts is laborious—and fortunately, unnecessary.
For more information on solutions for running your businesses’ technology more efficiently, visit our website or contact Megan Meisner at mmeisner@launchpadonline.com or 813 448-7100 x210.
This article was originally posted by Susan Harkins for TechRepublic.


